Saturday, February 25, 2017

Stuffed Giraffe - Rumpled Quilt Skins


I found this product line by accident. When I was helping my mother clean out her sewing room last summer, I found an ad for stuffed animal fish that she must have ripped out of a magazine a long time ago. 

Needless to say, this product line is now one of my favorites. They're a line of stuffed animals called Rumpled Quilt Skins. They have all different types of animals (sheep, zebra, fish, etc.) and part of the way that you make them creates the rumpled look they have to their skin. I think they're really sweet. 

There is an etsy site where you can purchase and download the pattern as a PDF. Here's the link:

https://www.etsy.com/shop/rumpledquiltskins?ref=shop_sugg

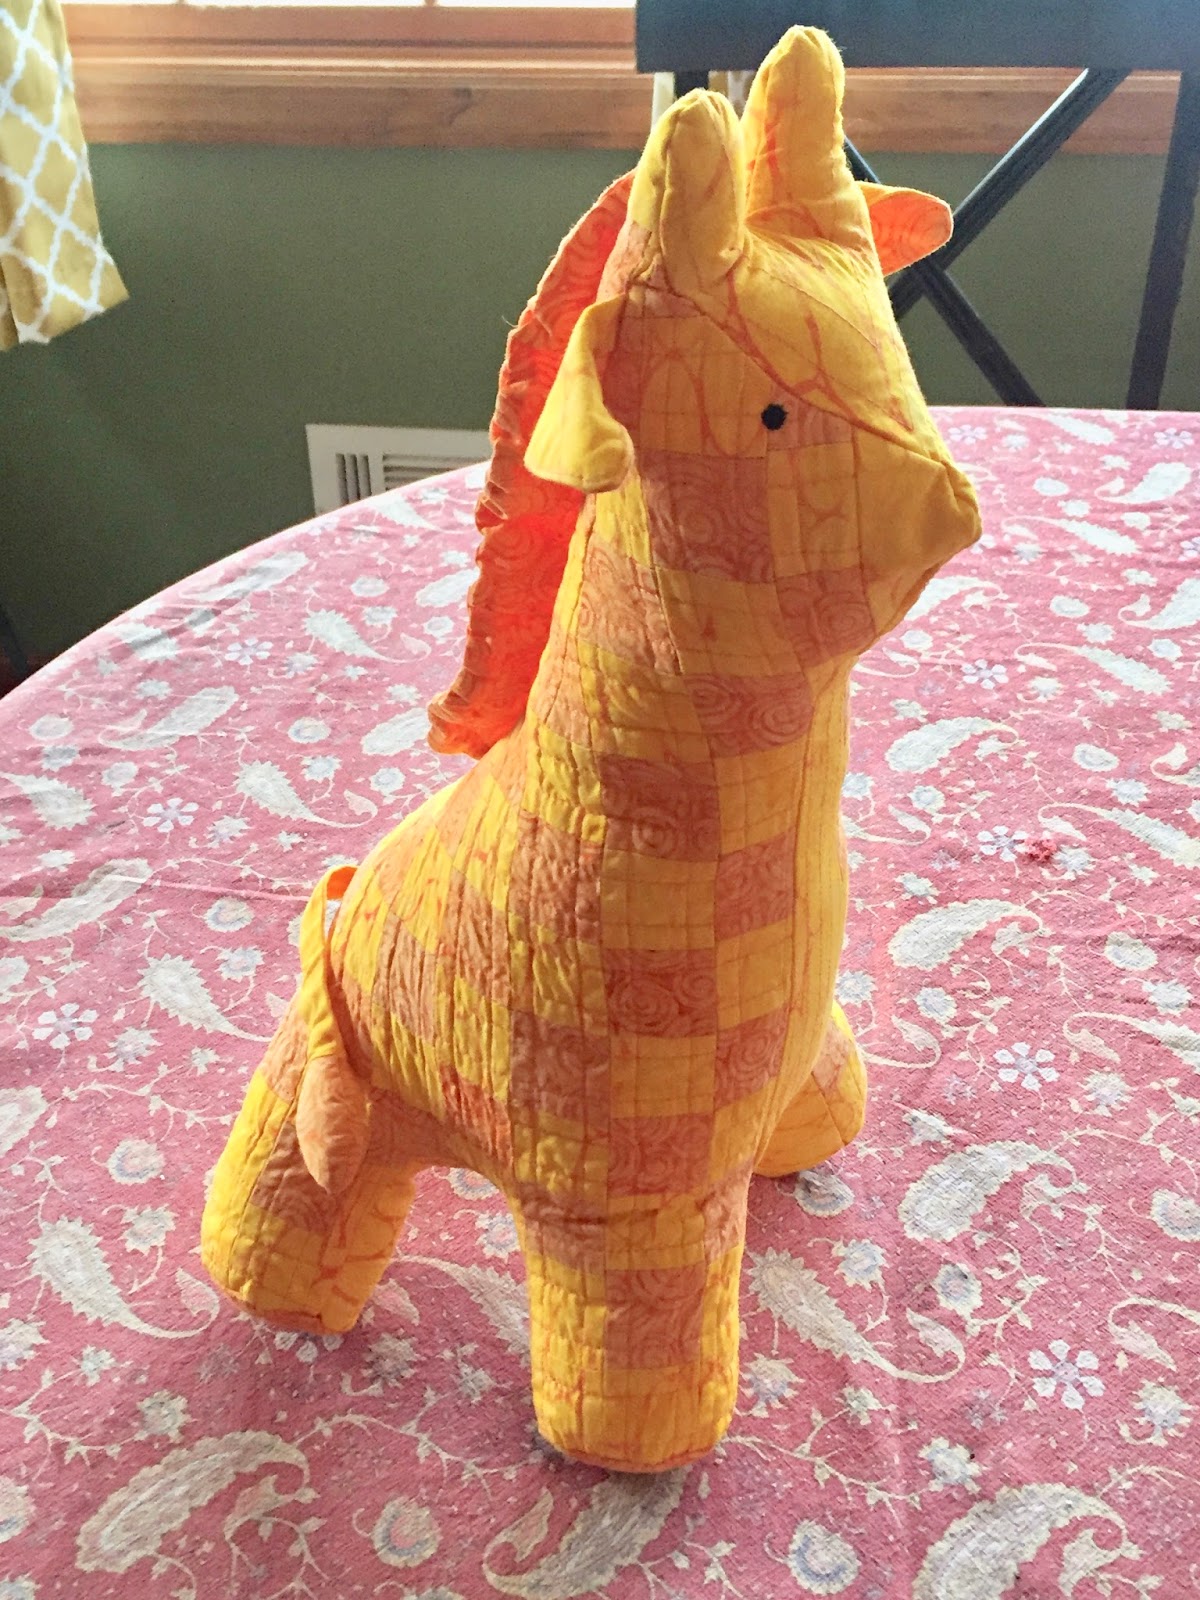
I decided to make this giraffe for my friends' baby's first birthday. Here's my disclaimer. I'm not good at making stuffed animals. There are a lot of steps to making this, and it this was almost a deterrent for me. However, the directions were very clear, and I think it came out pretty well. 

You needed to purchase 2 fabrics to make your giraffe. I chose yellow and orange batiks. You also need muslin and interfacing.

Step one was to make the checkered fabric. To do this, you cut the fabric into strips, then sew it together with the colors alternating.


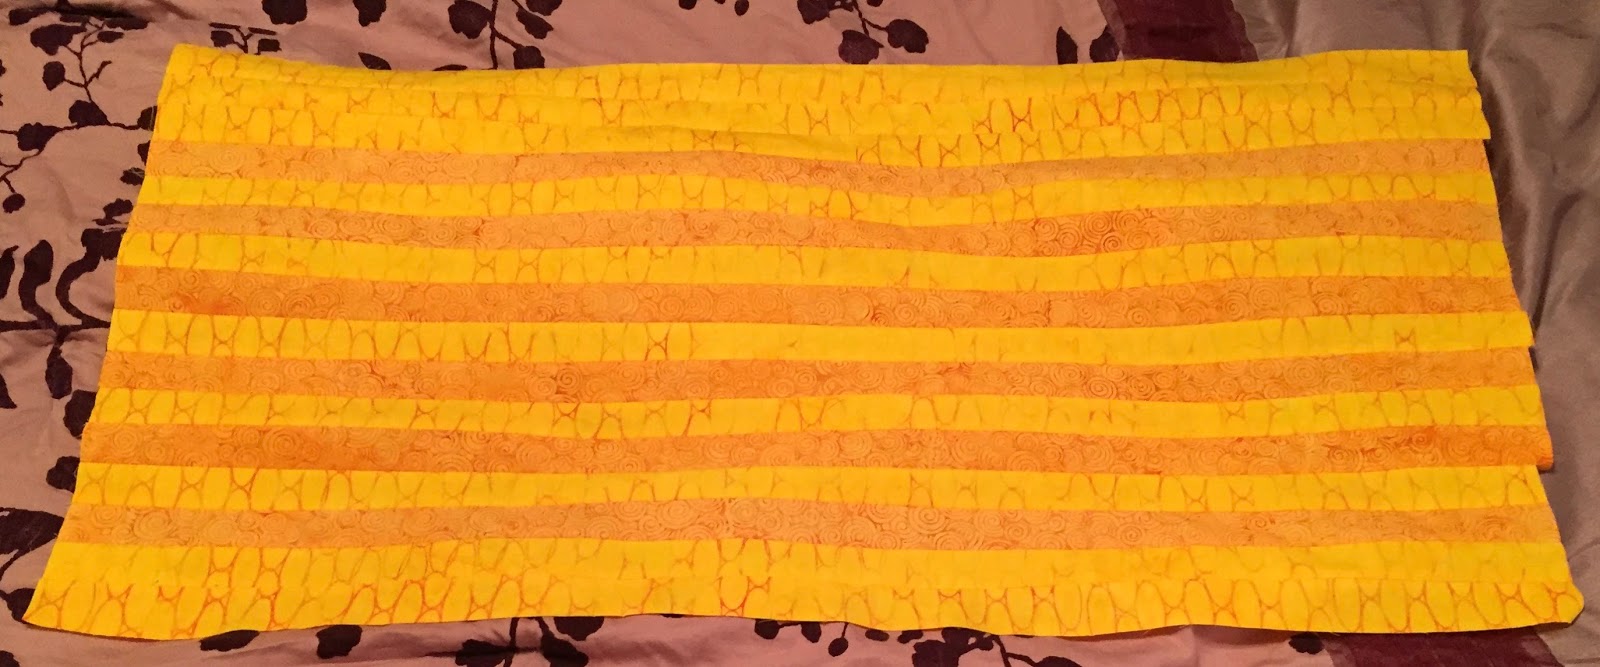
Then you cut it apart in the other direction, and finally sew it back together with the colors staggered.

The biggest pattern pieces are the giraffe body. You cut two out of this fabric that you've created. 


Then you get to the part that I didn't really understand at first. You sew the bodies down to a piece of muslin, criss-crossing the seams on the checkerboard. I tried to do this in a contrasting color thread so it would look more interesting.

 
Then you trimmed the muslin off of the body pieces. After that, you have to assemble all the body pieces. As I said earlier, this pattern had some of the best directions for stuffed animal assembly that I've seen. Additionally, a lot of the pieces have detailed decorative stitches in them. There were circular patterns on the feet and some other similar designs that really brought a lot of detail to the project. 

After construction, you end up with a crazy looking inside-out giraffe.


You flip it right-side out and...

...a flat giraffe is born. After this you put the giraffe into the washing machine and the drier. The way that you sewed the body pieces down to the muslin makes the body rumpled looking - giving the company its name.

Here's the giraffe post-drier: nice and rumpled

You can sew two eyeballs onto your giraffe. You can also use buttons, but since I was making mine for a one-year old, I decided to go with thread eyeballs.


Finally, it's stuffing time...
Sew him up, and he's done! I hope my friends like stuffed animals, because I know that I'm going to be ordering many more of these patterns in the future. I absolutely love the ease of the pattern, the rumpled look, and the overall design.


Sunday, February 12, 2017

Barn Block of the Month - Farm Girl Quilt Variation


I really like the idea of Block of the Month. I've done a couple...of which I don't think I've completed any. Typical. The quilt guild that I belong to does a Block of the Month where someone chooses which block to make, and those who participate make two. One block you keep (which will end up a 12-block quilt by the end of the year) and one block you bring to the meeting, where you get put into a drawing to win all of the blocks for that month. (I won January...blog on the results of those blocks forthcoming...)

This year we are making blocks out of the Farm Girl Vintage Quilt Book. This book is designed along the lines of one of the farmer's wife quilt books.

You can get this book in many places, including on Amazon. It seems to run about $25 most places.
Here's the link to it on Amazon.

https://www.amazon.com/Farm-Girl-Vintage-Lori-Bonnet/dp/0988174979/ref=sr_1_1?ie=UTF8&qid=1486925311&sr=8-1&keywords=farm+girl+vintage

It's a nice book with a lot of interesting blocks. The actual blocks, such as the ones pictured on the quilt, are 6" finished. The book also has larger-block options for you to set the blocks into - such as farmhouses, with tractors, etc.

I've been making the single block-of-the month blocks for the guild and for myself, however I could not see myself making a barn to go with each block. I just have no interest in making a whole quilt of barns. It's not really my style.

My mother came up with a brilliant idea: to make one barn block and design a way to hang each month's block on it. This way it's one barn and you just change the blocks like a calendar.

First, I made the barn.


Then I unmade the barn, replacing the white square with a barn-colored square. That square is where your "quilt block" goes when you're making the complete piece. I don't know what I was thinking when I made it white. Lame.

I sewed some detail into the barn door...(just don't look at the wonky quarter).


Afterwards, I opened up two spots in that seem to put the bias tape I was using to create the block-holding system. Then I sewed it closed with those in place.


Then I sandwiched it with batting and muslin, quilted it stitch-in-the-ditch around the barn, made a sleeve out of the muslin, and machine bound the piece with my fail-safe blanket stitch.


Here's the completed barn:


So each month I will make a square to hang on the barn. The January block is called a Butter Churn Block and includes the infamous, dreaded, half-square triangles which never come out straight. I picked winter colors of January:

 
After making the block, I layered a piece of binding and white fabric and sewed around the edges, leaving gaps for the tabs to hang it. Then I flipped it, inserted two pieces of bias tape, and top-stitched it closed. Then I quilted in the negative space.


Here's the February block - the Churn Dash Block - more half-square triangles (I forsee many more in my future). I did the February block with reds for Valentine's Day and followed the same process.


I needed two dowels to hang this project, both of which I stole from my mother. I even needed to break out my long-neglected circular saw to cut them down. Here's the finished product...


My mother made hers by blending different barn blocks from the book. She wanted a silo in hers, but we both didn't like the fact that the barn is only shown from the front and the quilt would be hung where the door would be in that variation. So she used the same barn that I did but added the silo to the side. Here's hers as a point of comparison:


Here's my only concern about this project moving forward...as you can see by the pictures of the two blocks, I have to place the tabs in different places based on where the colored fabric lays. I'm going to have to check every block as I make them to make sure the tabs end up in places where they can actually be hung. Not the end of the world, but something else for my teacher-brain to try to remember and think about.

Monday, January 2, 2017

Quick Runner - a Fast, Pretty, and Easy Gift


This is a super easy table runner that I made for my best friend for Christmas. 

Surprise: my mother just told me she designed the pattern for the runner. You can e-mail her at LaPrincipessa40@aol.com for info about purchasing it.

I made this runner with five fabrics. It is definitely possible to make it with less; probably 3-4, depending on how you arrange them. The print fabrics I used are by Phillip Jacobs. I also used a Kaffe Fassett green shot cotton and a blue batik.

I started off by embroidering a bird on the batik that would match the fabric in the outside squares. This bird embroidery was downloaded from urbanthreads. 
Here's the link: http://www.urbanthreads.com/products.aspx?productid=UT3536

I also looked at a million hummingbird embroidery files in trying to select one and finally settled on this "Doodle Hummingbird" because it is more open than not. I thought that an embroidery that was too dense would detract from the overall piece. I tried to pick up colors in the embroidery that would match the colors in the other blocks.

Assembly for this project is simple - sew the borders attaching the squares horizontally, sew the borders on top. Sew outside borders. 

Because I hate binding, I decided to do a wrap-around binding. There are three levels of binding.

1. The correct way to bind - sew to the front on the machine, sew to the back by hand.

2. The lazy way - sew to the back by machine, sew to the front by machine, use a decorative stitch to disguise your laziness as creativity.

3. The super lazy way - make the back of the piece about an inch larger than the front, fold that in half moving around the piece, fold it over the front, and machine sew it to the front by machine, using a decorative stitch to disguise your laziness as creativity.

I'm a solid level three binding quilter on small projects. On bigger projects, I go for number two.

Of course the backing was a little too small to fit the front of the quilt and do the wrap-around binding, so I had to add a small strip of green down the middle of the back, which actually ended up looking interesting on the front, so I'm really happy with that decision anyway.

After sandwiching top, batting, and backing, I quilted a decorative stitch centered on the green borders using a variegated blue thread.

Finally, I completed my wrap-around binding, took some pictures, and packed it up in a box to ship off to Florida.

This pattern was super quick and easy and I think I'm going to use it to make myself a runner out of some Kaffe Fasset fabrics that I received for Christmas.

Saturday, December 3, 2016

Patriotic Quilt of Valor


This is my donation quilt for Quilts of Valor. Quilts of Valor provides quilts to veterans of United States military service. This is the website if you're interested in donating a quilt. http://www.qovf.org/

I also made this quilt in order to compete in a Patriotic Quilt Challenge in the guild that I am a member of. (And I Won! :) )

I did not follow a specific design for this quilt - I kind of made it up as I went along. 

In my stash I had a bunch of patriotic charm packs. I'll take this opportunity that to admit that I have a charm pack problem. I have an entire box of them, waiting to be used. Most of them I purchased as daily deals from Missouri Star Quilt Company or Fat Quarter Shop. Needless to say, I've cut myself off (at least until I use some of them).

I found the pattern for the star blocks on pinterest.


https://www.pinterest.com/pin/465630048957792963/

First, I separated all the charm pack blocks and arranged them so there wouldn't be any repeating fabrics within one block and so that they would be evenly distributed throughout (text, stripes, stars, etc). Sorry, my OCD is showing.

I started assembling the blocks and ran into a few issues. Firstly, I had a white solid charm pack that I was going to use for all the star bits, but realized that the method used to make the triangular parts ended up wasting a lot of fabric in the charm packs. I HATE WASTING FABRIC. So I used the charm pack squares for the center square and cut the triangular pieces out of some kona white that I had lying around. 

Problem two - when assembling the squares, they weren't lining up correctly. So, I measured the charm packs (you know, what I should have done first), and found that they were not all the same size. Insert annoyed emoji here. So I went back and trimmed the squares to the 2.5 inches square that they lied about being and finally was able to successfully put the star squares together.


For the stripe squares, I did the same thing - laid out the red squares so there were no repeats within a square, no polka dots or stripes touching, excuse me ma'am, your OCD is showing again...

I cut the red and white squares in half and then sewed them together. I made these blocks a little bigger than I had to because I figured it would be easier to trim them down after I squared the star blocks. 


After these squares were complete (5 blue stars, 4 red and white stripes), I sewed them all together.


Then it was time to figure out how to make this square into a rectangular 60"x80" quilt needed to meet the requirements for Quilts of Valor.

I started by putting a red trim around the whole thing. But...I didn't buy enough red fabric, so I found white fabric with blue stars that I had laying around (good luck for me) and made them into cornerstones so I wouldn't have to go back to the store. Did I mention that I didn't figure out I didn't have enough fabric to go all the way around before I sewed it on? Yeah. I spent some time with Jack-the-seam-ripper on that one.


Finally, it was time to turn this into a rectangle, so I added this AWESOME red, white, and blue fabric to two sides of the square.


Then, I added a blue border all the way around the rectangle. Here is a picture of the completed quilt top.


For the back, I used this technique that someone told me about in the quilt shop, where you fold the fabric in half longways, sew along the binding side, then cut the fabric up the long side. Poof, instant backing fabric!

I sandwiched the quilt and started quilting. Originally, I wanted to quilt marching blue stars on the red and white squares and red stripes on the blue squares. However, I couldn't get the stars to look right, so I sewed asterisk-style stars on the striped blocks, sewing lines down the centers of the squares in both directions and connecting diagonal corners. I sewed stripes on the blue star squares, as planned.


 Red Quilting on Blue Star Square


Blue Quilting on Red Striped Square

Here are some other quilted elements...nothing fancy, just simple stuff. (I'm not brave enough to try anything really complicated yet...).

 Stripes going the opposite direction of the print.
More stars and stripes

I binded the quilt in the same striped fabric, which contrasted nicely with the blue border.

I'm really happy with how this quilt turned out. I really made it up as I went along and hoped for the best. 

As soon as I make a label for it, I will be sending it off to a veteran in appreciate of their service of the country, hopefully in time for Christmas.
 

Sunday, October 16, 2016

Halloween Candy Corn Quilt


I love Halloween! I've wanted to make a Halloween quilt since I've started quilting, and I still have two more to make...there's always next year. But this year I managed to make my first one! This quilt uses embroidery files I purchased about two years ago from a company named Charming Station Embroidery. This company designs mylar embroidery sets. 

Here's a link to their website:
http://www.charmingstation.com/

Here's a link to this embroidery set:
http://www.charmingstation.com/SpecialSets/Specials17/Specials328.html

On their website, there is a very thorough description of what mylar is, what mylar embroidery is, and how to use mylar in your embroidery projects. Here's my quick explanation. Mylar is a sheet of shimmery plasticy material (similar to vinyl but much less stiff). You can order it in packs from a person linked on their website which allows you to get the type that can go in the washer and dryer. The color that I used and that they recommend is opal iridescent.

Here's how you use the mylar in your embroidery design:

You hoop your material as usual. You tape (or hold) the square of mylar in place as the machine tacks down the outside edge of the design. That's it! Then you go through the rest of the design as usual. When you've completed all the steps, you rip the excess mylar right off the outside of the design. 

The designs that are produced by charming station are not dense, which allows the background fabric and the shimmer of the mylar to shine through the stitching. Personally, I LOVE these designs! 

Here's a closer look:


There are 12 designs total. And the stitchout time is not very long - maybe 15 minutes for the longest one. 

Here's all of them pre-quilt:


Next, I had to decide how I wanted to put them together. I chose to sew two borders around each one, a dark Halloween fabric, and an orange fabric.


Then came the most tedious part. Cut strips the length of the each block to create the sashing between the rows and sew them together so they are all in long rows. Also, remember to make sure the fabric goes in the same direction...let me say that again...make sure you're sewing the sashing fabric on in the same directions (I can't imagine why that would be worth mentioning twice...). Finally I cut long strips to sew in between assembled rows. When this was complete it came out looking like this...


Finally, I pieced a back, sandwiched, and quilted by stitch-in-the-ditch along all of the sashing pieces. My least favorite part, binding time. I chose the orange so it would contrast with the black border, and machine stitched it on, using a blanket stitch on the front.
Still not perfect...but I've gotten much better!
And finally, done. And ready a whole month before Halloween! I still need to make a label for it. I think I'll name it "Trick or Treat," unless I can come up with something more clever. I love this quilt!! It has a seat of distinction on my couch between a Halloween pillow my mom made and a crazy quilt pumpkin I made....until Halloween anyway.

HAPPY HALLOWEEN!

Monday, October 3, 2016

Fall Mug Rugs

I'm a member of the Molly Pitcher's Stitchers guild in my town, and during the course of the year we sign up to bring in door prizes for the monthly meetings. Door prizes can be fabric, sewing tools or accessories, or handmade items. I decided to make fall themed mug rugs for my door prize.

My mother has a Anita Goodesign membership and there is a pretty fall set in the current collection. The design pack is called "Autumn 1, 2, 3." You can check out the collection here: https://www.anitagoodesignonline.com/product/autumn-123/

Anita Goodesign's 1, 2, 3 collections are amazing embroidery tools. You can mix and match borders (some with embroidery on them!), embroidery designs, and stippling or background stitches from a fairly large collection of options.

Here are some close-ups of the designs I chose to use.

I don't like the coloring of the bird's face. If I were to stitch this one again, I'd alter it somewhat to make the features stand out better.

This one is my favorite.
Here's the process:
1. I stitched all the designs on a piece of fabric.
2. I decided how big I wanted the mug rugs to come out. 
When they were completed, they were about 5x7.
3. I cut them all to the same(ish) size.
4. I found a coordinating backing fabric, and cut pieces to match. 
5. I sandwiched it with some batting inside.
6. I made binding, and machine binded it like a quilt. I used a leaf pattern decorative stitch and brown variegated thread to bind the front. 

Things that I didn't do that I should have:
Binding things that are small is difficult and annoying. If I made these again, I would have cut the back pieces of fabric larger than the front and used a wrap around binding method to finish them.

All in all, I'm happy with how these came out and would probably make them again as a quick gift.